Yummy Fig, Fennel, and Goat Cheese Bars Fig, Fennel, and Goat Cheese Bars
Just this week, my fig tree delivered its first ripe fruit of the season. Every year it produces more and more figs, and besides giving them away to friends and neighbors, I’m finding new ways to use this special, luscious fruit. Figs in all stages. So pretty!
Last year I made fig and ginger compote—so yummy on toast—and this year, I continue to throw them on the grill alongside my garden veggies. If you haven’t tried this, please do. The figs caramelize into a gooey softness and they are wonderful in a goat cheese salad, onto crostini, as an accompaniment to grilled pork or chicken, and on top of ice cream. The possibilities are endless so use your imagination. Almost anywhere you would use grilled fruit, such as peaches, you can substitute figs.
In my upcoming book, The Sicilian Sorceress, my main character, Alexis, makes fig bars for her clients so I thought I’d get into her head and create my own version. The result was amazing! I used ingredients popular in ancient Sicily: figs, almonds, goat cheese, Greek yogurt, and fennel. The recipe for Fig, Fennel, and Goat Cheese Bars is in the book so unfortunately, I can’t reveal it just yet. Sorry! It will soon be available within the next two months. Please subscribe to my monthly newsletter at Mary Knight for interesting articles and updates on a publication date. The Sicilian Sorceress has several Sicilian recipes, many I learned while in Sicily. Follow me along as I continue to be inspired by Mediterranean cuisine!
Ciao for now,
Love is a fruit in season at all times, and within reach of every hand. –Mother Teresa
Let me introduce my writing friend, colleague, and guest blogger, Jolie Tunnell. Jolie is witty, sassy, and knows how to tell a story. Her blog at JolieTunnell.com shares humeroustales of her five children, husband, and new kitten and is always a fun read. She’s got a lot more action on her site than just her blog, so please check it out!
Recently we were bemoaning the fact that we couldn’t just jump on a plane and fly to Italy for inspiration. Inspiration meaning immediately heading to the local gelateria for a pick-me-up. I asked her to share her experiences with this Italian classic to give us all a break from reality.
Thank you Jolie!
In 2018, guest blogger Jolie Tunnell and her Hubby spent their 30th wedding anniversary traveling Italy and sampling the cuisine. By “sample,” we mean “ate as much as they could hold on any given day.” This is her take on the gelato experience, followed by recommendations for locally sourcing the tempting treat.
Not all gelato is created equal.
As a matter of fact, you cannot walk a Roman city block without tripping face first into three different gelato displays, and as tempting as it is to eat your way through Italy with a cucchiaio (spoon) in your hand, you need to know the “Good” sources from the “Great.” You don’t have to settle for less, here in the motherland.
On every street corner.
“Good” will have a small case of flavors, ten or so basics, tucked into a larger establishment like a restaurant or souvenir shop. “Good” gelato is made in a factory from sullen cows with whatever ingredients are handy, but you may as well try it in order to educate your palate.
When Pesto Meets Gelato
“Great” will have a wide variety of flavors, twenty at least, in a place dedicated only to this frozen delight. It will have over 150 if you’ve arrived in gelato Nirvana…which exists in Rome. Maybe it has won major awards for deliciousness in Sorrento. It will say “gelateria” over the door and have a bonafide gelato party going on inside.
The Real Deal
“Great” gelato is crafted from the finest fresh ingredients from someone’s secret family recipe that Nonna left under her pillow. Each artisanal flavor will be piled into tall fluffy mountains of joy with bits of the ingredient tossed on top. ie: the pineapple gelato will be wearing a pineapple crown and the walnut gelato will be studded with walnuts. They branch out with lighter sorbets, too, just to mix things up.
Browsing Lido.
The chilled pan of nocciola will be half empty because the Master Gelatieres can’t stop sampling it for quality control.
Corniglia Cuties
This place is taking gelato as seriously as you are and that’s good Great.
Roman Cookie Topper.
Next – always choose a cup, not a cone. Don’t be that guy with the cone we watched over and over, wandering sideways into the middle of a busy square attempting to lick his gelato into submission and losing the battle. You will run into him later in the baptistry – sprinkled in holy pistachio. Marked by his dedication.
Gelato deserves your complete attention.
Anacapri-Triple-Lutz.
Now for the best part: Choosing your flavors. Begin slowly, don’t hurt yourself. We began with single flavor starter cups and worked our way up to professional level with three for four flavors at once. This allowed us to sample sometimes eight flavors at a time, because sharing is caring.
Also, this is how you discover that tart lemon and smooth chocolate go surprising well together in a single lick. My absolute favorites were the pear and the fig. The flavors are rich but also subtle, with bits of dried sweet pear or fresh fig swirled into the gelato. Unusual and delicious.
Last licks.
While we impatiently wait for a chance to revisit this beautiful country, its delicious cuisine, and its precious people, we offer you a quick perusal of local San Diego gelaterias. Enjoy your sweet summer treat on a friendly neighborhood sidewalk as the sun drops into the west and remind yourself that Italy is only a lick away.
Deliziosa!
Voglio mangiare il gelato tutto il giorno! (I want to eat gelato all day long!)
Jolie Tunnell is a freelance writer, blogger, and aspiring novelist with a background that includes administration, education, and – thanks to her five kids – a sixteen year stint in the PTA. She serves up hard-won wisdom with humor, compassion and insight from her home in San Diego, California. Visit her at JolieTunnell.com, LinkedIn, or Facebook, or be her writing buddy at NaNoWriMo.
Flavors worth finding:
Cocco (coconut)
Pistachio
Amarena (tart cherry swirl)
Deep Dark Cioccolato (death by chocolate)
Stracciatella (a bit like chocolate chip)
Peanut (not peanut butter sadly, but more like a raw peanut ice cream)
Pera (pear and ricotta)
Berry
Tiramisu
Albicocca (apricot)
Nocciola (hazelnut)
Mango (basically you are just eating a chilled perfect mango)
Limone (tart lemon)
Mistero Latino (it’s still a Latin Mystery to me but it was quite tasty)
This chocolate decadence is sure to capture a heart—or two!
To me, chocolate represents everything good in life. It has helped me through my darkest hours, given me clarity when I am indecisive, and won hearts when it counts.
That is why I cannot imagine Valentine’s Day without chocolate. Whether you are wooing a mate or just treating yourself or family, this flourless chocolate cake will cast a spell for love, which is what we all need, right?
I use Galantino’s olive oils, pure and strictly local to Puglia. It’s the best olive oil I have tasted.
Torta Caprese is a traditional Italian chocolate dessert, rich and dense with chocolate and almonds and moisturized with olive oil. This recipe is from Galantino’s collection. A decadent finale! Excellent served with espresso. Buon appetito!
Line a 9″ springform pan with parchment paper. Lightly oil the bottom.
Preheat oven to 325 degrees.
6oz.good-quality bittersweet chocolatenot unsweetened, chopped and melted
1/2cupplus 2 Tbls. extra virgin olive oil – I use Galantino Mandarin EVOO* but you can use any high-quality EVOO
1Tbls.grated orange rind
4large eggsseparated
1cupsugarI use superfine
7oz.almond flour or finely ground whole almonds
Pinchof salt
whipped cream to decorate or if you preferpowdered sugar dust
Method
Gently melt the chocolate and stir in the olive oil. Set aside.
Beat the sugar and 4 egg yolks until light and creamy.
Stir the ground almonds or almond flour into the sugar and egg mixture.
Gently stir in the melted chocolate and olive oil.
Beat the 4 egg whites with a pinch of salt until stiff peaks form.
Gradually fold the egg whites into the chocolate mixture. The mixture will not be light and airy but still rather dense.
Pour into prepared pan and bake for about 50 minutes. I usually start checking the cake at 40 minutes by inserting a toothpick in the center to see if the inside is still damp or beginning to form moist crumbs. This cake does have a fudgy inside so do not over bake it.
Let cool for half an hour and run a spatula around the edges to loosen the sides. Undo the sides of the pan and let cool. Cake can be kept for up to 5 days, wrapped in plastic wrap in the refrigerator. It actually improves with flavor!
*EVOO = Extra Virgin Olive Oil
I have made this cake using the full amount of mandarin EVOO and have also made it with half mandarin and half EVOO. Feel free to improvise by using only EVOO, eliminating the orange zest, and perhaps stirring in a teaspoon. of coffee power for a bold chocolate coffee flavor. Or, use EVOO and stir in a teaspoon of almond extract. Use your imagination!
“Chocolate symbolizes, as does no other food, luxury, comfort, sensuality, gratification, and love.”
Moist and bursting with orange, these bars won over everyone who tasted them!
My Gramma has done it again: delivered a recipe with oranges that sounded so incredibly good that I made it immediately and now cannot stop snacking. I came across it during my annual January purge. This year, my studio, which is jammed with multiple writing resources, became the lucky recipient of the clean-out. While rearranging and dusting off my cooking and gardening books, I discovered two plastic recipe file boxes, shoved to the back of the shelf and temporarily hidden. Even though chaos abounded, I took some time to look through each box and every recipe, some from my mom but most from my Gramma. I love how she recorded her recipes by neatly typing them on index cards or thin onionskin paper. This gem for Orange Spice Bars nudged at my sweet tooth. Now that my two orange trees are bursting with fruit, I am ready to make them a center stage of many dishes.
The magic box of recipes and memories.My beautiful orange trees bring me so much joy.
The recipe comes together easily and takes me back in time. As I creamed the butter and sugar and folded in the walnuts, I felt my Gramma’s presence in the kitchen with me, donned in her well-worn and faded yellow apron, sipping coffee and nodding her head in approval. Gramma, thanks for documenting so many wonderful, tasty recipes. I promise to make more of them!
Bet you can’t eat just one!
Mary Knight
Gramma's Orange Spice Bars
4.50 from 2 votes
These moist bars, with the combination of orange and spices, go well with tea or coffee or as an afternoon snack.
On a plane en route to Albuquerque, final destination Santa Fe, I devoured a book by one of my food writer gurus, Ruth Reichl. Her latest book, Save me the Plums, was just released and is a memoir of her life as editor-in-chief of Gourmet Magazine, my favorite food magazine – ever.
I have read all her books, and as an admirer, I couldn’t wait to hear her insider’s view on the world of publishing. A recipe she included in the book called Jeweled Chocolate Cake caught my eye, and I couldn’t stop thinking about making it upon my return home.
So, what was I up to this time in Santa Fe, my favorite destination? A friend told me about a food photography workshop at a retreat center, Santa Fe Workshops, nestled in the foot of the Sangre de Cristo mountains. Photography is one of my loves but capturing food always alludes me —the lighting, composition, and how to edit the photos without just pushing the “boost” icon in iPhoto. My photography life was about to change.
The workshop taught by food photographer Tracy Benjamin of Shutterbean awakened my brain and revitalized the artistic side I thought was fading.
Tracy is a talented photographer, artist, and exceptional teacher. Her patience and easy-going spirit propelled the five of us into a new world of visual possibilities. After four intensive days of shooting food in the retreat basement, the Santa Fe Plaza, and bars and restaurants, I felt revitalized and ready to utilize my new-found skills. By the way, the other four women in the workshop humbled and inspired me with their unique talents and diverse careers. I learned a lot from them.
Almond and hazelnut praline
Back to the cake. The pastry chef in me erupted like Mt. Etna. As soon as I returned home, I began my photography experimentation, beginning with baking Ruth’s Jeweled Chocolate Cake and composing photos to highlight its exquisiteness. The dark, velvety cake has a whisper of mascarpone topping and then a tumble of crunchy, glistening praline. I finished photographing it around 6 p.m. and couldn’t resist having a slice before dinner. A trio of flavors collaborated on my tongue. Soft, dense, and tender chocolate, creamy, tangy frosting, and an accent mark of crunchy sugar nut sparkles. One bite, and the marriage was consummated.It kept tempting me back. And, I am not really a cake person, so this one is a serious keeper! Thank you, Ruth, for the decadent recipe and another great read.
I love how this cake glistens like pieces of amber.
I am discovering once again that baking is my groove. And now, showcasing the photos that highlight my sweet creations gives me gratitude for this life-long passion. Thank you Tracy! You are a gifted teacher and I will continue the journey . . .
One bite, and I’m hooked!
Get the recipe for Jeweled Chocolate Cake and watch an interview with Ms. Reichl at:
Home Ec class, circa 1970. Our teacher, Mrs. Talbot, handed out mimeographed recipes for Pineapple Upside Down Cake. Exotic! We donned our aprons, made in the sewing class she taught, and organized the ingredients. Our class was the giggly kind but, today, the giggles were replaced by intrigue and excitement. Learning how to make a cake from scratch!
I don’t think I had ever eaten a Pineapple Upside-down Cake before this class, but now, I was hooked. The cloying topping of brown sugar and butter melding into the canned pineapple rings sang “Hawaii,” a place we all dreamed of going. The extra juices seeped into the velvety-textured white cake. We devoured the cake and couldn’t wait to try it at home.
My best girlfriend and I went on a Pineapple Upside-down Cake binge. We made it monthly, always adding more brown sugar to the topping to satisfy our sweet tooth. It was addicting.
Last year, I tried to recreate the old-school recipe and could only find modern versions. Then, when sorting recipes, I found this one I had cut out from the Riverside Press-Enterprise in 1991, and eureka! I hit the mother lode. Making this again brought back so many happy memories of high school friends, how we loved our Home Ec class, and the teacher we made fun of but secretly really admired and respected. Cheers to a classic!
Such a happy cake!
Mary Knight
Pineapple Upside Down Cake
5 from 1 vote
This cake will take you back in time. Make it for family and watch them eat the sugary edges first!
<span class="mceItemHidden" data-mce-bogus="1"><span></span>Preheat oven to 350 degrees.</span>
<span class="mceItemHidden" data-mce-bogus="1"><span></span>Drain pineapple slices and cherries on paper towels to absorb extra moisture.</span>
Melt 1/4 cup butter in a 10” cast iron skillet
Stir in brown sugar and remove from heat.
<span class="mceItemHidden" data-mce-bogus="1"><span></span>Place a pineapple ring in the center of the sugar mixture and assemble pineapple rings to surround the center ring. Place a cherry in the middle of each ring. Tuck pecan halves inbetween slices.</span>
Combine egg yolks, 2 Tablespoons of the sour cream and vanilla in a small bowl.
In a mixing bowl, combine flour, sugar, baking powder, baking soda and salt. Mix together.
Add butter and remaining sour cream. Mix until dry ingredients are moistened. Beat for a minute or two.
Add egg mixture in thirds, beating between each addition.
Batter will look silky.
Pour batter carefully over pineapple slices and spread evenly.
Bake for 30-35 minutes or until a toothpick inserted in center comes out clean. Cake should be deep brown on top.
Invert immediately onto a cake plate. Let rest for a minute to release the cake. If some of the pineapple rings stick to the bottom of the pan, simply pick them up and place them on the cake.
Cool or eat warm. It has just the right amount of sweetness and the top edges form crispy, sugary bites.
“One should never save cake for later when it can be eaten now.” ― Marissa Meyer, Winter
While cleaning out an upper cupboard in my closet last week, I discovered a forgotten box. A treasure full of old recipes I had created when I taught cooking classes, as well as letters and postcards I’d sent my parents from La Varenne in Paris, France. It was like opening a present on Christmas Day. The “missing pieces” from my life suddenly inspired me to return to the recipes I’d embraced many years ago. Early in my cooking career, ideas for recipes came like lightning strikes, unexpected but exhilarating, followed by cloud bursts of extended creations. It all seemed so easy. I almost couldn’t get the ideas down fast enough, not to mention implement them.
Here is one of those recipes for Almondines that I’ve adapted. The results impressed me more than I’d expected. The tart is made delectable by the inclusion of almond paste. Rich and tender, the almond filling almost melts on the tongue, and the unifying light almond crust is the accent mark. Divine. It’s been a hit with all my taste testers. The best part is you can fill the tarts with the almond creme, sprinkle on the sliced almonds, and freeze for an impromptu breakfast or tea time. They only take about 18 minutes to bake or about 25 if frozen. I’m making a batch to freeze for weekend guests and last-minute holiday gatherings. Enjoy!
Mary Knight
Almondines
5 from 2 votes
These delicious tarts make a great dessert, breakfast pastry or tea time treat.
Cut in the butter pieces until size of small peas.
Combine the egg yolk, almond extract and water.
Drizzle into the flour mixture and combine gently.
If the pastry feels too dry, add a bit more water.
Knead lightly to form a ball. Pat the ball into a 6” round, wrap in plastic wrap and chill in the refrigerator for at least a half an hour.
Note: I use a food processor to make my crusts.
Meanwhile, make the almond filling.
Almond Filling
In a stand mixer, cream the butter, sugar, and almond paste together.
Beat in the eggs one by one.
Beat until light in color and fluffy. This will take about 5 minutes. Stir in the almond extract.
Slowly add the flour and salt. Mix just until combined.
You can refrigerate the filling at this time or use immediately.
Note #1: I made this recipe using organic sugar with crystals much larger than the white C&H variety. The crystals melted into the butter and did not whip up into a fluffy mass. The filling was much denser than I like. I prefer using regular white sugar for the filling for a lighter crumb.
Note #2: I prefer to weigh my ingredients. There is a tiny bit of discrepancy in the measurements when you use Standard vs Metric measuring. This is not enough to alter the recipe.
Roll the dough out to 1/4” thick. Cut into rounds appropriate for your tart tins. I used 4” tart tins and the recipe made 11 tarts. You can also make one large tart using a 9” quiche tin. If the dough seems too sticky, you can pinch off pieces of dough and fit them into the tart molds.
Pat the dough into the tins and place in the freezer to chill.
Preheat oven to 350°F.
When the pastry crusts are cold, fill with almond mixture and sprinkle with sliced almonds. Pat the almonds down slightly to help them adhere to the filling.
Bake for 15-18 minutes. They are done when deep brown on top.
Brush the warm tarts with strained apricot jam to create a beautiful glaze.
These can also be frozen after they are baked.
Believe in your heart that you’re meant to live a life full of passion, purpose, magic and miracles. ― Roy T. Bennett, The Light in the Heart
I’m interrupting my travelogue of Sicily to tell you about yet another fantastic paella party I hosted on Saturday. This was our 4th annual party and my mom and I decided to take it to the next level. “I saw this interesting Garcima Paella Burner at Pata Negra,” my mom said enthusiastically. Pata Negra is our local Spanish food stuffs store and also carries every size of paella pan and accessories to throw a great paella party. I returned to the store with her and fell in love with the concept. Two propane-fueled ring burners attach to a tripod. The paella pan sits on top. No more messy charcoal! Click here to see them at La Tienda.
The knowledgeable salesman saw me eyeing the packages of squid ink or sepia, I so enjoyed in Sicilian pastas. He pointed out a sepia broth that he swore would make the BEST paella ever. How could we refuse? The black broth, from the squid ink, would turn the rice black!
Sepia or Squid Ink broth for the Paella. You can buy it at Spanish TableSauteeing the Bomba rice with olive oil. You can see the Garcima Paella Burner setup.
I love inviting guests who are eager to try new and different foods.
Me and my fabulous aunt Barb, who is a fabulous chef herself.My cousin Ali, who is a master at organizing parties and who helped me more than I can say, and my beautiful mom, the birthday girl.My co-chef Eva, me and my best friend Jenny!Me and my dear friend Alan who makes the best cocktails on the planet!Our guests: Jenn, Joanne, Jan, Barb and Mom
Here I was, trying something totally new on my 11 guinea pig guests! The entire paella prep was reduced by half by using the sepia broth. All we did was chop one onion, sauté it in a fair amount of olive oil, add the Bomba Spanish rice, stir, then add the warmed sepia broth. I stirred in a pinch of saffron (from Palermo!) and about a teaspoon of smoked paprika. Now all that was left to do was to let it steam while we prepped the seafood to top the paella.
Eva and me adding the mollusks. We are having fun!
We tucked clams, mussels, squid ringlets with their tentacles and shrimp into the cooked rice and covered it with foil for about five minutes. Mangiamo!
Finished Seafood Paella before garnishing with roasted red peppers and fresh parsley.
I think everyone agreed, this was the best paella ever. The sepia broth delivered a richness, almost as if I had slaved all day to make the perfect fish broth using fish heads and shellfish. The unusual squid ink that colors the rice black just made the entire dish more interesting and a great conversation piece!
Jenny and her colorful salad.The perfect crunchy green salad to go with the Paella.
The paella was accompanied by a gorgeous green salad, made by my best friend Jenny, and some chunks of French bread. This was a celebration for my mom’s birthday and every year she craves Pavlova as her birthday cake. The meringue was one of the best I’ve ever made. Thick, soft marshmallow meringue with a lemon creme filling, topped with whipped cream and fresh berries. Always a crowd pleaser and all the prep can be done in advance. Assembly takes about five minutes! My advice for throwing a party – keep it simple. Limit the dishes to one hearty main, a salad, bread and dessert and involve your friends in the cooking and prepping process. Don’t forget the after dinner dance party! Ours lasted until midnight!
Pavlova – a slice of marshmallowy lightness with a tang of lemon creme. Yummy!My wonderful mom, the birthday girl!
The next time you make paella, I hope you try it with the sepia broth. You will thank me.
“When you hear a Spanish cook describe a paella or a cake, you realize she’s using a much richer repertoire of adjectives than what one of us would use to characterize a book or an important experience.”
― Julio Cortázar, Final Exam
Il Fiorentino. Pistachio heaven with Pino and Franca.
A Pistachio Inspired Pranzo
A review of Il Fiorentino, Bronte, Sicily
Another lovely blue-skied day in Sicily. Today’s adventure and culinary find takes us from the aquamarine sea to a mountain top and then half-way down the other side. All this to reach our lunch (pranzo) destination, Il Fiorentino, in the paise (village) of Bronte. Bronte is well-known for its pistachios grown in the foothills of Mt. Etna. Sicilians take pride in this regional nut, claiming the minerals from the lava in the earth give the pistachios a special richness and intensity to their flavor.
It is a Monday and most eateries are closed on Mondays. Roberto called ahead to double-check and the owner replied, “Si!, viene!” Winding curvy roads, with views that resembled the Rocky Mountains, the terrain suddenly dips down into vast open meadows filled with colorful cows and even llamas. Around another corner and Roberto immediately swings into a street parking spot right in front of the restaurant. Arriviamo! We walk through the beaded curtain entrance and are greeted by Pino, the owner. A warm, fuzzy feeling takes over, like I am entering a friend’s home, someone who has lived here for a very long time. The room’s light comes only through its windows. Old memorabilia line the walls and shelves while crisp, white tablecloths anchor the maybe 10 tables. Charming. As it happened, Il Fiorentino is closed but Pino opens just for us! We will have a private pranzo, cooked to order.
Interior of Il Fiorentino, Pistachios are their specialty!Pino is a small man, maybe mid 60’s, conservatively dressed in a shirt and buttoned up v-neck sweater, wearing a closed-lipped grin. He hands us menus but Roberto clearly knows the ropes and orders for both of us. A bottle of water and a carafe of red wine are placed on the table and the feast begins.
Trio of Bruschetta
A trio of caramelized onion, pomodoro and herb bruschetta sets the tone for the meal. Roberto orders a primi of antipasto to share. An abundance and variety of textures and colors activates my taste buds. Caponata, green beans, home-cured salami, local olives and caciocavallo cheese, fried potatoes and two kinds of stuffed and fried squash blossoms fill every corner of the plate. I first dig into the fried, mozzarella-stuffed squash blossom, its cheese oozing all over my fork. The salty, melting warmth brings forth a squeal of delight. Pino’s grin widens as he watches me eat with such pleasure. I enjoy the local caciocavallo cheese so much, he returns with another large slice and sets it next to me. So sweet.
Exquisite Antipasto Plate
Il Fiorentino’s menu offers two kinds of their specialty pasta with pistachios, “Casarecci al Pistacchio.” It is a warm day and Pino suggests the “red” pasta with tomato, eggplant and onion for me. Roberto likes the “white” pasta in a light cream sauce. The presentation in beautiful Sicilian ceramic bowls make this experience extra special. Both dishes are heavily dusted with freshly chopped pistachios. Pino makes sure I understand that he has picked and shelled these pistachios. I eat slowly, savoring every bite. When I reach the bottom of my bowl to scrape every last morsel onto my fork, I am greeted by a smiling sun face! It was if she is saying, “I’m glad you enjoyed me so much!”
Pistachio Smothered PastaMiss Sun made my day!
Our plates are cleared away and Pino asks, “Would you like some cherries?” Certo! A bowl of just picked and perfectly ripe burgundy beauties is placed between us and we eagerly bite into the juicy flesh. Pino is obviously still enjoying our display of delight with his food.
Palate cleanser of cherries
Il Fiorentino’s specialty dessert is pistachio gelato served with pistachio cake. Even though I am feeling pasta-full, I cannot resist dessert. I take a scoop of the intensely flavored, nutty gelato and smear it on top of the cake to eat them together. Ice cream and cake! I especially love the moist cake with a slightly sugar crunch on top. My pastry mind is putting the ingredients together. Meringue? Flourless? So enamored with the cake, I ask Pino how it is made. He shrugs his shoulders and then leads me to the kitchen to meet his wife, Franca, who is the star chef of the restaurant. Delighted by the compliment, she eagerly shares her recipe with me. I am overwhelmed by her kindness.
Pistachio cake plus pistachio gelato. A match made in heaven!
For me, this is the definition of a great dining experience. Besides fantastic fresh food, it’s the warm hospitality in a comfortable home-like setting. Mostly, it’s Pino and Franca who so lovingly share their livelihood, that forever will endear me to Il Fiorentino. If you are ever in Sicily, do not miss the opportunity to dine with them!
Here is Franca’s recipe for the Pistachio Cake.
Franca's Sicilian Pistachio Cake
A light and flourless cake studded with pistachios
As a former pastry chef, I am constantly on the quest for beautifully crafted and tasty pastries and of course, gelato. What I saw and tasted in Sicily really wowed me and delivered an unexpected surprise. Very similar to beautiful French pastries, only using more of what mother nature locally provides, like pistachios, almonds and citrus, from this sunny island. I thought I’d share a few photos I took of the diversity of Sicilian pastries to make your mouth water or to perhaps inspire your next creations. Be sure to check out the photo captions for links, or use these, to learn how to make cannoli,semi freddo, marzipan, and brioche.
A Sicilian pastry classic, the cannoli. Click here to see how it’s made! CannoliTempting Sicilian Candied ApplesSicilian Apple Tarte and Brioche – to eat with granita!Sicilian Watermelon Tarte (I’d never ever seen anything like this!)Sicilian Stuffed LemonsSicilian SalAmone Cake – stunning!Sicilian Mandorle (Almond) Semi Freddo Click here to see how to make Semi FreddoSicilian Chocolate Cakes AlmondineSicilian Cake Sveva. So gorgeous!The perfect Sicilian Croissant!Sicilian Drumsticks. I always wanted to go back to get one but never made it. Next time!
Sicilian brioche. The color says it all! Here’s my recipe for Brioche!Marzipan – a Sicilian classic. Here’s a great story on the history and making of this elegant confection. Sicilian Marzipan
Sicilian Coffee & Pistachio GelatoProud Sicilian Signore Gelato!Sicilian Panna Cotta Cake with Berries. So sweet!
Sicilian Festive Semi Freddo
Did you see something that inspired you? Some of these pastries are truly imaginative! I think a Semi Freddo will be my weekend project!
“All of Sicily is a dimension of the imagination.”
Leonardo Sciascia
When the rhubarb arrives in my small local grocer, late spring, it’s like a mid-year Christmas present. I don’t know where I got this fondness for rhubarb but it does seem to be a fetish of mine.
Years ago, I remember having dinner in a rural cafe in Hamilton, Montana. You know, the old-fashioned kind of cafe/roadhouse where when you walk in, the selection of freshly baked homemade pies in a glass case next to the cashier, catches your eye. That evening, the case was sparse with a few slices of chocolate cream pie, apple pie and one lonely slice of rhubarb pie. My friend Cami, also a rhubarb fan, and I were set on sharing this sweet favorite after dinner. When it came time to order dessert, we watched as “our” slice of rhubarb left the case, only to be delivered to the table next to us. “Oh no!” we both cried in unison. The person about to dig in looked up and saw our dismay. He kindly stood up and walked the rhubarb slice over to us and sat it down on our table, giving up his slice of heaven so we could have ours. An act of kindness I will never forget, and a memory Cami and I will always share, giving us a good giggle always!
As I still carry a torch for rhubarb, my heart leapt a little when I spied the tall ruby stalks, neatly lined up next to the lettuce in the produce department earlier this week. Immediately my mind began imagining how I would honor this humble and often neglected vegetable.
Last year I created my Rhubarb Almond Meringue Cake. A stunner, definitely for a special occasion. This year I am simplifying. The stars in this recipe: a pâte fine sucrée (sugar crust) from Jacques Pepin’s book, “A French Chef Cooks at Home,” a compote of rhubarb, strawberries, lemon and sugar, and vanilla ice cream.
1crust pâte fine sucréeJacques’ crust recipes are my “go to’s for faultless crusts Feel free to use your own favorite pie crust recipe.
3cupsrhubarbcut into 1/2” cubes. If the rhubarb is cut smaller, it tends to disintegrate.
1/2cupsliced strawberriesI had berries that were beginning to go bad so used them up You can replace them with more rhubarb if you wish.
1Tablespoonfresh lemon juice
1/2cupsugar
1pintvanilla ice creamslightly softened
Method
Make the pâte fine sucrée, refrigerate, then roll out to 1/4” thick. Cut rounds with a 4” scalloped cutter, prick with a fork and freeze for 15 minutes. This makes about 8-9 rounds. Meanwhile, preheat oven to 400 degrees.
For the rhubarb compote:
Combine rhubarb, strawberries, lemon juice and sugar in a saucepan and heat over medium heat, stirring until slightly thick. It will continue to thicken as it cools. This takes about 12-15 minutes. Remove from heat and let cool.
Bake the pastry rounds for about 12 minutes until golden brown. Remove from oven and cool.
Soften the ice cream, then swirl in a few tablespoons of the rhubarb compote. Freeze until cold. Remove from freezer and using an ice cream scoop, scoop out the rhubarb swirl in neat rounds and place on a parchment lined paper. Refreeze until ready to use.
To assemble:
Ladle about 14 cup of the rhubarb compote onto a dessert plate. Place the pie crust round on top of the compote, leaving a border of rhubarb. Add a scoop of rhubarb swirl ice cream on top. If desired, spoon on more rhubarb compote.
This recipe can be made in stages and then assembled easily for dessert.
For those of you who have never tasted rhubarb or think it tastes like something else, give this a go. One of my friends who happened to be over when I was making the compote, said she didn’t think she’d like it because it would be bitter. I gave her a spoonful to try and then she asked for another, larger spoonful!! Sold!
“And the birds sang their songs of love. And the flowers serenaded with their sublime fragrances. And the whole world fell in love in spring!” ― Avijeet Das
Pears have this seductive quality about them. They flaunt their curvy hips and hold their stem high, like wearing a tiny crown. Their taste and texture, soft, sweet and flowery, almost melts in your mouth. Rustic, yet delicate describe the Bosc variety, my favorite for poaching and making tarts. They hold their shape and don’t disintigrate into mush. A brown, weathered-looking skin, like years of overdoing a suntan, distinguishes them from the rest of their pear family. During the winter, I make wine poached pears and serve them after a hearty meal to bring a lightness to dessert. Deep burgundy sings of the holidays and is a show-stopper with little effort and can be made ahead. Dust them with powered sugar to give them a festive feel.
The leftover wine can be used to make Glugg, a Swedish hot wine drink, perfect for sipping beside the fire. “There are only ten minutes in the life of a pear when it is perfect to eat.” ― Ralph Waldo Emerson
“Oh to be a pear tree – any tree in bloom! With kissing bees singing of the beginning of the world!” ― Zora Neale Hurston, Their Eyes Were Watching God
1/2cupport - the port give a deeper color and richer flavor
1/2cupsugar
2cupswater
1cinnamon stick
3cloves
3peppercorns
Orange rind from 1/2 an orange
For the filling:
1/2cupmascarpone
10amaretti cookiescrushed
1/2teaspoonalmond extract
Method
Combine all ingredients in a large saucepan and bring to a boil. Reduce to low and simmer 45 minutes to one hour. This helps create the spicy infusion of flavors.
Core the pears by using a knife to cut out the bottom of the pear, then scoop out the seeds with a melon baller. I carve a larger than usual cave to make room for the mascarpone and amaretti mixture, a surprise treat inside.
Peel the pears starting from the stem, and down toward the bottom. This keeps the shape of the pears. Slip each pear into the simmering wine and poach for approximately 45 minutes to one hour. I use a deep wooden spoon or ladle to baste the pears every 15 minutes or so. A metal spoon might cut the delicate fruit. Gently flip them several times so their burgundy color is even.
Cool in the pot, preferably overnight.
Filling
Mix together the mascarpone and amaretti cookies. Stir in the almond extract. I like to have a few bites of cookie when I eat it with the pear, so don’t pulverize the amaretti. Gently stuff the bottom of the pears with the filling and set upright on a platter. Pour a little of the poaching liquid onto the bottom of the platter. Dust with powered sugar and wait for the applause.
She lured me in with her perfect “t” shaped limbs, reaching out like angel wings. “Take me home.” she whispered. Not planning to add another fruit tree to my already demanding garden, this one was like an abandoned puppy. You know, the one that finds you. I’d always loved Fuyu persimmons, their sweet versatility making them perfect for eating like an apple, or slicing into a salad for a burst of orange color.
I could not resist. Dreaming of harvesting my own persimmons made me drool with anticipation, so I loaded her into my car. That April, while planting her next to my avocado tree, she told me her name was Francesca. We bonded.
Fall arrived and she dropped her leaves, baring her naked body for what would seem like an eternity. I tended to her every need: water, fertilizer, regular conversations. “Francesca, amore. I believe in you,” I coaxed. But still, she stood frozen in time, seemingly in a time warp. My angel was fading into a ghost.
A year after I planted Francesca, I returned to the nursery where I bought her to show them photos with a final plea for help. Their advice: scrape the bark and if it is green, she is still alive. With hope, my fingernail drew a line in the bark, revealing a bright green interior. Realizing this was a test of my patience, I relaxed and observed. Within two weeks small lime green buds appeared, followed by flowers, then tiny miniature fruit. I was in love again. Our relationship had come full circle.
My first harvest!
Bright, determined and painted by nature.
The inside slices look like a sand dollar!
In October, my reward was a dozen, perfectly shaped, pumpkin orange persimmons. Inspired by Francesca’s endurance, I’ve designed a few recipes to celebrate her beauty and honor her as a treasured member of my garden family.
Right out of the oven with a brush of glaze. I love how the maple leaves look like a wreath!
Mary Knight
Persimmon Breakfast Bake
This light and colorful pastry is perfect for either a pre or post Thanksgiving breakfast gathering. Your guests will want another piece!
I sheet frozen puff pastry dough - I use Trader Joe’s frozen Puff Pastry
Egg wash - one egg lightly beaten with a pinch of salt.
4ouncescream cheese or honey goat cheese
1/4cupmascarpone cheese
2Tablespoonshoney
1/2Teaspoonvanilla extract
2medium ripe fuyu persimmons
Apricot jam to glaze
Method
Preheat oven to 425 degrees.
Thaw the sheet of puff pastry for an hour in the refrigerator.
Cut out a 10” circle. I invert a bowl with a 10” diameter onto the dough to use as a template.
Chill the round while you cut out the decorations for the edging. I used mini maple leaf cutters but you can use any design or even leave it rimless if you like.
Freeze the dough and decorations for 10 minutes.
Mix the cream cheese or goat cheese with the mascarpone cheese, honey and vanilla until smooth.
Remove the pastry from the freezer and evenly spread the filling on top of the dough leaving an inch border.
Brush the edges with egg wash to help the borders stick. Layer the persimmon slices on top, starting at the outer edge and working your way inward to form a spiral. Place the maple leaves on the egg washed rim all the way around. You will have a border with a fancy edge!
Freeze again for 10 minutes.
Bake for 35 minutes or until the bottom and edges of the tart are deep brown and crispy. About half way through I put foil around the edges to prevent them from getting too dark. Make sure the tart is well-baked. I learned that the French method is to bake their pastries on the darker side. Remove from the oven and brush with strained apricot jam while still warm. Slice and eat immediately.
Harvest Salad
Author: Mary Knight
One bunch lettuce – I prefer butter lettuce for its delicate consistency. An addition of curly endive would be lovely too.
Ingredients
1-2 persimmons, cut into thin wedges
1 fennel bulb, cleaned and cut into thin slices
1/4 cup toasted and coarsely chopped hazelnuts. Don’t hazelnuts just speak “holiday?”
Sprinkling of fennel pollen if you have it. If not, here is a good source: [url href=”http://www.thespicehouse.com” target=”_blank”]The Spice House[/url][br]
[br][b]Dressing[/b]
2 Tablespoons dark, thick balsamic vinegar. I love fig balsamic.
1/4 cup good quality olive oil.
salt, pepper
Instructions
Toss salad ingredients together. Add the nuts at the last minute so they don’t get soggy. Mix the vinegar and olive oil together and salt and pepper to taste. I don’t like to overpower the flavor of the salad ingredients with too many dressing ingredients so keep it simple.
Drizzle on the dressing and enjoy the fall flavors!
3.5.3229
The fruit of your own hard work is the sweetest. Deepika Padukone
I’ve always had a thing for peaches. I think it’s because my mom said when she was pregnant with me, she craved them. This love must have been passed along in utero because I too, delight in the season of stone fruit. Every summer at the beach, we would excavate the old-fashioned, wooden sided hand crank ice cream maker and churn out quarts of fragrant peach ice cream, our favorite flavor. We took turns cranking the handle till our arms ached, all the while anticipating the best part – licking the paddle. It was a summer ritual. Besides ice cream, peaches consumed our summertime baking activities: peach jam, peach pie, and my personal favorite, peach kuchen. I don’t know where the recipe for peach kuchen came from but I’ve been making it for over 45 years and still love it as much as I did as a teenager. Maybe it brings back fond memories of those care-free summers, swimming for hours in the warm ocean by day and baking with peaches by night.
Sweet and juicy ripe peaches from the farmer’s market, the best kind, are the foundation for my Peach Kuchen. The recipe comes together easily as there is no dough to roll out, just a crumble that you pat into the bottom and sides of a pan. Slice peaches on top and sprinkle with sugar. A top sour cream layer adds depth of flavor when paired with the juicy peaches and buttery crust. It is irresistible and great for breakfast too!
Mary Knight
Peachy Keen
Note: Although this recipe is called a “Kuchen,” it is not the typical German yeast dough Kuchen. It must be a modification perhaps by my grandmother.
Lately I’ve been feeling disenchanted with the world. About the only thing I find enchanting is my lovely, colorful garden. This is just a phase I’m going through. We all have them.
To console myself, instead of watching evening tv, I crawled into bed with food. Figuratively, not literally! I perused my cookbook shelves and started pulling notebooks and recipe books that spoke to me. I have a few treasured and tattered notebooks that contain my private collection of dessert recipes from my days as a pastry chef . I’ve relied on the basics from these books but really haven’t delved into the more serious desserts that lined my pastry cases. Suddenly, my enchantment with life was restored. Flashbacks of colorful fruit desserts filled my head and my creativity shifted into fifth gear.
A recipe for almond meringue caught my eye. “How could I make this special and new?” I asked myself. Rhubarb! And it was all over. I quickly jotted down my ideas and slept well, excited to start cooking and already tasting the combination I dreamed up.
Rhubarb is one of those indescribable flavors that if you love it, you really love it and count the days until it is in season. Rhubarb pie—who doesn’t love it? Every year I wait for spring rhubarb and try all sorts of new recipes using this vegetable. Yes, it is technically a vegetable. Rhubarb is just beginning to make its appearance in southern California. My friend Di lives in Iowa and told me last week how she and her sister planned to pick the rhubarb in their backyard that grows like crazy, and make strawberry rhubarb jam. I was envious. I became so whinny about her stash of rhubarb, she even offered to ship me some!
My vision for a cake with rhubarb turned out perfectly, in beauty and in bite. I assembled it yesterday afternoon, took photos and then my mom and I dug in, anxious to taste it, as our dinner cooked. “Dessert first?” We asked each other. We both nodded and could not put our forks down. And yes, we did have another piece each after dinner!
As beautiful as it is, because it is a meringue, has a short shelf life and when cut, does not hold its shape for long. Use a serrated knife for best results. There are just two steps to the recipe and each can be made a day ahead. The rhubarb compote will last for 7-10 days in the frig and once the meringues are baked, you can leave them in the oven (oven turned off) overnight so they won’t collect moisture and stay dry.
This recipe is one of the very best, I think, I have ever created. I hope you make it and enjoy it as much!
Line two sheet trays with parchment paper. Place an 8” cake pan bottom on the paper and draw a circle for your template. Repeat two more times. You will need three circles for the three layers of meringue. Turn the paper over so you can see the outline but so the meringue will not absorb the ink or pencil.
Measure half the sugar, the almond meal and cornstarch together. Set aside.
Beat egg whites until foamy and starting to hold together. Slowly add the remaining half of the sugar—75 grams. Beat until glossy about 5 minutes total time.
Fold in remaining sugar/almond mixture.
Fold in almond extract.
Place the meringue into a 14-16” pastry bag, fitted with a plain tip. Starting on the outside line, pipe the meringue, working your way inward until the circle is all meringue. Repeat with the other two circles.
I had a little bit of meringue left over so made these little buttons to use as added decorations.
Bake 225 degrees for about one hour or until very dry. Turn the oven off and let your meringues sit there until you are ready to use them.
Rhubarb Compote
Yield: 3 cups
Combine sugar and water in saucepan. Stir until sugar is dissolved. Add rhubarb and lemon juice.
Cook on medium heat for about 10 minutes. The rhubarb will break down. This is the reason I cut it into such large pieces.
Cool and refrigerate until ready to use.
To assemble:
Whip cream until soft peaks form. Place whipped cream in a pastry bag, ready to pipe.
Place one meringue round on a cake plate or cardboard cake round. Spread about 1 cup of the rhubarb compote evenly on top of the meringue.
Pipe a whipped cream border around the edge of the cake, then fill in the middle. You can go lightly on the cream in the middle. The whipped cream adds a creaminess but you don’t want the cake to be mostly cream!
Sprinkle about 3/4 of one of the boxes of raspberries on top of the cream. I made sure some of the raspberries stuck out of the sides for the glamour effect.
Repeat with another meringue, rhubarb compote, cream and raspberries.
Place the last layer on top and spread with remaining rhubarb. Sprinkle the remaining raspberries on top and voila!
This would be delicious served with chilled Prosecco.
Folding in the almond meal
Piped circles of meringue
Love how the color goes from this
The cake blends in with my Grandma’s antique plates
Delectable
“People who love to eat are always the best people.” ― Julia Child
How beautiful and trendy! A piece of artwork for your kitchen.
The other day as I was whipping up a lemon chiffon cake in my Kitchen Aid, I felt this rush of love and adoration for this appliance that has been the stronghold of my various kitchens for over 37 years. I know it sounds crazy to be in love with a kitchen appliance but really, it’s about the stories it harbors. The Kitchen Aid has assisted me in making pasta, grinding meat, kneading dough along with basic mixing for cookies. This work horse deserves a tribute.
It’s a family love affair. My mom purchased her first Kitchen Aid in the early 60’s after being enticed by the ads in her cooking magazines. An avid cook with a fetish for cooking gadgets, the latest avocado green Kitchen Aid soon graced her kitchen counter, matching the decor of bold blossoms of orange, yellow and green wall paper that peppered her kitchen. Mom wasn’t the only one who embraced this new time-saving appliance. I latched onto it too when my teenage sweet tooth took over and chocolate whipped cream-stuffed angel food cake and pineapple upside down cake became my specialties.
This is what my mom’s Kitchen Aid looked like circa 1964.
I received my first, very own Kitchen Aid at the ago of 23, as a gift from my grandmother who was proud of my culinary accomplishments from La Varenne cooking school. So this tribute is to you too, Grammy, a fine cook and wonderful Bohemian pastry maker who influenced my cooking style from early on.
As a pastry chef, my Hobart, made by Kitchen Aid, was my best friend, cranking out Italian meringue by the gallon, kneading pounds of brioche and mixing tart dough for the next day’s pastries. It was the boss of the kitchen.
A baker’s must-have appliance.
Because I have a curious nature, I researched a bit more about this amazing appliance to see just exactly how it came to be. Here’s what I discovered.
The first mixer was produced in 1919 by the Hobart Corporation and was called “the Hub.” It was designed by Herbert Johnston after observing workers making dough by hand and thinking there must be an easier way. The Kitchen Aid continued to evolve, getting exposure in Good Housekeeping and Harper’s Bazaar. It was in vogue to own one of these time-saving machines. In 1955, five vibrant colors were introduced: Island Green, Petal Pink, Sunny Yellow, Antique Copper and Satin Chrome. Now you really wanted to invite the ladies over to see your kitchen! Cooking became a lot more fun!
Vintage Kitchen Aids
Vintage and sporty!
Color is not very appetizing!
Cotton Candy color!
Talk about an appliance that transcends time. The style has changed very little and it has continued to be center stage for the home cook as well as the professional. I decided to write about this fabulous appliance because I have recently renewed my relationship with it. It sat in a cabinet with little use for years. Now that I have moved it to my counter, I am enjoying its power a couple of times a week. My Kitchen Aid inspires me to want to test just one more recipe and I’m having a lot more fun in my own kitchen!
Do you have a favorite memory of something you created when your Kitchen Aid first joined your kitchen? Please share!
Stay tuned next week for a recipe for Almond Meringue Rhubarb Cake. My mouth is watering just thinking about it!
Click here to watch a great video on the history of the Kitchen Aid.
“You may feel that you have eaten too much…But this pastry is like feathers – it is like snow. It is in fact good for you, a digestive!” ― M.F.K. Fisher, The Art of Eating
I think my favorite thing about Valentine’s Day is the spirit of kindness and love that seem to carry on throughout the month. Yes, it’s commercial but love is everlasting, right? As a child, it was my favorite holiday. We would fold red, pink and white construction paper in half, then draw the curves that created the hearts. After cutting out many heart sizes, the fun began to create cards for family and classmates. Our teachers taught us how to construct and decorate large envelopes to hold our valentines. With our name on the front, these envelopes hung around the classroom, soon to hold notes of love from secret admirers. When February 14th finally arrived, we paraded around the room, delivering our valentines into our classmate’s envelopes. Then the excitement began. Our moms brought cupcakes with pink icing topped with red hot hearts as well as heart-shaped sugar cookies glazed in white and sprinkled with red sugar crystals and silver beads. Sitting at our desks, our hands excitedly opened valentine after valentine while devouring all the homemade goodies and drinking, of course, red fruit punch. Everyone was happy. New budding relationships were born, even if we were only eight years old!
So, make a valentine, tell someone you love them and whip up this easy chocolate mousse for dessert. The best part is I’ve created it as a “shared” dessert. Just spoon or pipe it into a bowl, then using cookies or strawberries, dip into the mousse and enjoy. No spoons needed! It’s perfect for feeding each other, an intimate act of togetherness.
Happy Valentine’s Day!
Milk Chocolate Mousse
Notes: I turned to this method of making mousse when I reviewed my original recipes from my professional chef life and they all use uncooked egg yolks and whites. No one ever got sick, but these days, most people are careful about raw products. Someday I will share my delectable orange chocolate mousse but for now, let’s keep it simple!
I’ve adapted this mousse from a recipe I saw in Food & Wine. The concept is simplicity. A word of caution, do not over beat this mixture! As all good cooks, I tested this recipe twice. The first time, I tried to beat it into a whipped cream state. After I piped it out and refrigerated it, it was not light but rather heavy. Still tasty but not the texture I was anticipating. My second batch, I added a teaspoon of espresso powder to the cream as it heated. When it dissolved and the cream was hot, I added the chocolate. This time I checked the mousse frequently during the whipping process and stopped when it just barely held a peak. The results were much better and it actually piped out smoother.
One thing you might question is the use of milk versus dark chocolate. I prefer dark chocolate but with this method, when the mousse sets in the refrigerator, the dark chocolate will make it even denser because it lacks the milk in the milk chocolate. If you really want dark chocolate, I would use 2 1/2 cups of cream to the 10 ounces of chocolate. Another option is to stir in 2 teaspoons of Grand Marnier, brandy or other liqueur after you have poured the warm mixture into your beating bowl.
1tsp.espresso powder or coffee or 2 tsp. other liqueurall optional
Method
Heat the cream and espresso, if using, to dark warm. Do not boil. Stir in chocolate. Use a whisk and stir until chocolate is completely incorporated into cream.
Pour into your kitchen aid mixer or which ever bowl you will be beating it up in. Put in the refrigerator and chill until cold, about an hour.
On medium speed, beat the mixture until soft peaks form. Remember to not over beat.
Spoon into a beautiful bowl or individual cups.
Garnish with strawberries, espresso beans, chocolate sprinkles or whatever suits your fancy.
Carrie, Mary, Carolyn, Aunt Barb, Cousins Fran, Jane & Nancy
It’s all about a cake!
I collect cookbooks. Hundreds of them line shelves in my kitchen, studio and even bedroom. I have signed books by Julia Child, James Beard, Jacques Pepin and now Ina Garten! These were my mentors during my culinary career but the cookery books I treasure most are the really old turn-of-the-century true classics.
I recently discovered a box in storage of my parent’s old yearbooks and my mom’s baby book. Tucked into this box was an early 1909 hardback Good Housekeeping cookbook belonging to my great-grandmother, Carrie Vodak. Now Carrie was born in 1882 so this book is an antique.
1909 Vintage
Carrie’s handwritten notes
Unusual in its small, handy size, with crumbling parchment papers, this delicate book is a treasure trove of recipes along with facing blank pages for the cook to add her own twist. Recipes such as Cherry Roly Poly, Lamb Kidney en Brochette and Asparagus Loaf with Yellow Bechamel Sauce are even thrice tested in this 1909 publication. Was this the early “Joy of Cooking” for the American housewife at this time? Carrie must have loved to cook because her little book was full of handwritten recipes and notes.
After perusing most of this family heirloom, I closed my eyes and envisioned Carrie sitting at her kitchen table in Cicero, a Bohemian Chicago neighborhood, documenting her recent successes and planning dinner for her family of six. The year was 1915. Carrie was lucky because most of the meat and produce she cooked with was generously provided by Uncle John who had a farm in Iowa. The meat was stored in a salt barrel on the backyard porch. Nothing went to waste and every part of the animal was used. Carrie’s husband, Anton, was a tailor so between the three, the family was well-clothed and fed.
Carrie the cook and her husband, Anton the tailor
Every Saturday, after the kitchen floor was scrubbed clean, Carrie would lay down a clean tablecloth and she and her daughter Mary, my grandmother, born in 1907, would embark on a baking adventure. Bread was made for the week and hunks of cookie dough would be placed on the tablecloth floor for Mary to roll and cut into shapes using old fashioned metal cookie cutters that I still have. So the baking genes go way back!
My beautiful grandmother, Mary Vodak
Here is a cake my great-grandmother, Carrie, made for her daughter, Mary, and the same cake Mary made for her daughter, Carolyn, my mother, who also made it for me. So it is four generations old! Mary made it as an after-school treat and my mom carried on the tradition. I love the toasty coconut topping that caramelizes when you broil it. It’s super easy to make and will be devoured before you can say, “More please!” Enjoy!
My aunt Barb is a baker. Not just a home baker; she owned a bakery and can recite a recipe for a cake without blinking an eye. That is why, when she came for a visit, my task was to make for her a birthday cake that was so extraordinary she would be speechless. I think that’s what I did!
In perusing cake recipes, I came upon something that was more like a fruit-filled cake and pie combination. I had never seen anything like it and knew instantly that this was THE perfect cake. The combination of thin layers of lemon cake, lemon cream filling, whipped cream and meringue were making my mouth water.
My beautiful aunt Barb enjoying her birthday cake.
Nigella Lawson created this recipe. She gets all the credit.
Even though there are several steps, I promise it is not complicated. Do not worry about how the layers look after they are baked. After you assemble them, the cake comes together neatly and cuts like a dream. The cake lasts for about four days in the refrigerator. The only change I made was to use a bit more lemon cream for a thicker layer of tartness. This recipe sings of sweet, tart, crunchy (meringue) and soft. It has been added to my repertoire of celebratory cakes and is a keeper.
All I really need is love, but a little chocolate now and then doesn’t hurt! Lucy Van Pelt In Peanuts, by Charles M. Schulz.
What is your heart’s desire? When I ask myself this question, the first thing that comes to mind is, “love, always love.” Rather than one specific “love,” I desire this love be spread out over my family, Sparky, my friends and my garden. Of course we all have secret wishes and desires. These drive our dreams and goals. Everyone craves reciprocating love. It’s a fact of nature. For this moment I will reciprocate and share with you a recipe that will stir passion in your loved one. Instead of creating something exotic this month of Love, I turned to a basic comfort food – pudding, chocolate of course. Pudding seems like such a muddled word for this dessert that brings so much love and warmth into a kitchen. The late Richard Sax devised a recipe called Double-Chocolate Pudding that is a snap to make. So irresistible and luscious, I have made it twice this week. I prefer eating it still slightly warm and when I served it this way to my mom and aunt, the spoons were the only ones talking, their metal scraping every last morsel of dreaminess out of the ceramic dishes. The creamy, not-too-sweet, chocolate velvet temptation conjured up sweet childhood memories of begging to lick the bowl. Whatever it is your heart desires, I wish this for you. My heart’s desire – just one more spoonful of chocolate pudding!
Candle light, moon light, star light, The brightest glow is from love light. Grey Livingston
Le Croquembouche. A cream puff tree glazed with spun sugar and snow-capped with powdered sugar. It is as delicious as it is beautiful.
The Winter Solstice called to me to celebrate its commencement and what better way to honor this day than with a party for dear friends who have enriched my life. These gatherings always lighten my spirit and give me an excuse to create good food with maybe one show stopper. Pots of minestrone bubbled on the stove and guests filled my table with favorite dips, dishes and warm cocktails. Yes, by “warm cocktails” I mean hot apple cider, laced with Tuaca, an Italian vanilla and citrus liqueur, and garnished with whipped cream and cinnamon. A perfect holiday beverage.
The need to create something beautiful nudged my cooking muse. With sentimentality taking over, I decided on a dessert that my mom made long ago for our annual Christmas Eve open house. Enter Le Croquembouche. This masterpiece is a pièce montée or mounted piece of filled cream puffs glued together with caramelized sugar and piled high into a tower or tree. It is a work of love as it does take many hours and steps of preparation.
It starts with mini choux puffs of dough, piped onto a cookie sheet and baked until puffed and crisp.
The baked puffs, golden and ready to be filled with pastry cream.
Using a pastry bag, I fill the choux puffs with Grand Marnier infused pastry cream. Divine.
The creator of the croquembouche, French for “crunch in the mouth,” is Antoine Careme, who lived from 1784-1833. Careme was the most esteemed French chef of his time with a penchant for architecture, often creating replicas of Turkish Mosques, Gothic towers and other extravaganzas out of nougatine and cooked sugar. His Turkish Fez form became the shape that is most popular today. Little did I know that my Christmas tree croquembouche originated as a hat!
The puffs are first dipped in carmelized sugar, then carefully placed on the mold we made of foil-covered styrofoam.
Croquembouches are also a typical French wedding cake. The story dates back centuries when honey cakes were brought to the bride and groom. The cakes were stacked high and the couple had to kiss over the cakes without toppling them to insure a long life together and many children. Careme’s hard sugar-coating stabilized the stack thus increasing the chance that bride and groom would live happily ever after.
Even though it can be daunting to decide how to eat the croquembouche, I just encourage my guests to pull each puff off the tree with their fingers and pop the sugar-crunched pastries into their mouth. It’s a community nosh!
Dig in!
I wish you all a Merry Christmas, Buon Natale & Joyeux Noël!
My visit to Galantino in Puglia, Italy, was a composition of olive oil familiarization, in-depth visits to Puglia’s cheese makers, ceramists, bread artisans and olive groves and, the fun part, cooking lessons with Galantino’s head chef Leo. I joined a group from Holland who was also there for the same adventure. Each day we prepared different dishes all using a variety of what else – olive oil! The two recipes here, a foccacia and Caprese Cake are described with mostly technique as the recipes were for the masses. In the upcoming weeks, when my Virtuous Olive site goes live and I am back from Italy, I will publish detailed recipes. The Caprese Cake is especially delicious and different with the addition of orange or mandarin olive oil.
Chef Leo pours significant amounts of olive oil to coat the foccacia pans. All this oil enhances the flavor of this delicious Italian staple.
Chef Leo’s foccacia is a mixture of flour and potato flour. This cuts down the gluten and makes it a softer, spongier bread. The copious amounts of olive oil give the outer crust a crispiness.
The dough is pushed into the edges of the pan with fingertips to create the small divots characteristic of foccacia.
We each “decorated” a foccacia with slightly simmered pomodoro – tomato – oregano and sea salt.
Perla, the family dog, makes her hang out strategically and hopefully between the dining room and kitchen.
Eggs and sugar whisk together until fluffy with air in preparation for the Caprese Cake.
Maud stirs the orange olive oil into the melted chocolate. Decadent!
Cocoa powder and ground almonds are carefully folded into the eggs.
The melted chocolate is stirred into the batter and poured into an oiled and floured pan to bake for only 10 minutes.
The group eagerly awaits dinner and….the Caprese Cake.
This cake tastes as good as it looks. The orange and almond marry well with the chocolate giving it intensity.
Recipes will be forthcoming! I am eating more than I ever have here in the land of food alive with flavor and taking notes!
Delectable Torta Verdura, a sweet and savory dessert popular with the Lucchese, a style local to the area of Lucca.
Are you interested in learning some authentic Italian recipes from a bona fide cooking school in Lucca, Italy? If so, read on. Davino, my host from La Mimosa, had arranged for me to attend a cooking class at the International Academy of Italian Cuisine in Lucca, just on the other side of the hill from my house. I wasn’t sure what to expect but was grateful for the opportunity to join an ongoing class. This particular course trained students for a career as a professional chef. 10 were Japanese, two were Chinese and one was Italian. Mama Mia!
The whirlwind, Mariela.
The instructor was Mariela. She patiently went through the menu with us all, a translator changing Italian to Japanese and then to English for me. The clock started ticking. We started at 10 am and lunch was to be on the table by 1:30 pm. Then the switch went on. I felt like I was on Iron Chef. It was chaos – for a while. Pots began clamoring, students, almost in a panic, grabbed ingredients and bumped into each other, all in an attempt to put their ingredients in place for their designated recipes. The first minutes seemed uncertain, a searching for confidence, then this sense of order settled in. Dishes started to unfold.
A teaching moment.
I was told to go here, and then there, do this, then that. I felt a little out-of-place hovering, assisting, chopping, straining, the only sounds being Japanese words. Some students tolerated me and some were curious. Why was I here, interrupting this “professional” class? It certainly was not what I expected but I must say I learned a thing or two.
Like how to make the Torta Verdura. I had been curious about after eating it at the Festa. Made with swiss chard, cinnamon, cloves, nutmeg, candied citrus, raisins soaked in liquor, pinenuts and a little sugar.
All the goodness piled high awaiting a hand mix to create the pastry.
So it is a little savory, a little sweet and served as a dessert. The crust is like a pâté sucre, a sugary crust, and heavy with egg yolks. These happen to be brilliant orange – must be what the chickens eat.
Sunset colored yolks for the torta crust.
Hand mixing makes a tender crust. This is enough dough for three tortas.
I learned a new technique for decorating the crust to create little “beaks” by slicing the dough on an angle, then with a knife, folding it over the dough to its right.
Making a slit at an angle, then folding over the existing dough makes a pretty “beak’ decoration.
This torta, a Torta di Riso al Cioccolato, is filled with chocolate, rice, pinenuts and lemon zest.
The spinach, for the lasagna, was pressed through a tami, or strainer, for extra fineness – another good tip.
A finer pasta texture is achieved when the spinach is finely strained.
This sweet Italian student became my friend. We rolled out the pasta layers outside on the patio!
Mariela demonstrates the proper technique.
Bechamel sauce tops the spinach lasagna as the first layer.
A tomato sauce is swirled into the béchamel, then the layers continue. Delicioso!
I helped make a timbale of cardoons, which when cooked, have a similar flavor to artichokes. We squeezed lemon juice on our hands to prevent the cardoons from turning them black due to the iron in the vegetable. Cardoons look like tall, fat celery.
Cardoons are first stripped of their “strings” then chopped and cooked in boiling water to soften.
A last-minute plating of the appetizer.
Lunch was served on a lovely patio outdoors and I sat with the owner, Gianluca who has taught here for 10 years.
Our main course of stuffed veal roulade, cardoon custard and sautéed greens.
Gianluca’s students have eight weeks of training and then are placed in restaurants all over Italy for a 10-month internship. The students are not paid but receive room and board in exchange for this opportunity to learn from master chefs. His success rate is high and the students seem to thrive on this experience.
The owner and proprietor of the academy, Gianluca, turns out professional soon-to-be chefs.
The next time I visit Lucca I will participate in the evening classes which are designed for people who enjoy learning from local chefs and just want to have fun! Contact Gianluca for more information at:
The International Academy of Italian Cuisine In Lucca
This time of year, my thoughts return to my childhood and fond memories of Easter. Sentimentalist that I am, I still have my first Easter basket left by the Easter Bunny. Well-made, it has stood the test of time, the pink weaving now faded. I retrieve it from the upper cupboards of my closet every year and fill it with chocolate eggs and marshmallow peeps.
My vintage basket comes alive each spring.
This basket brings back fond memories of a simpler time of innocence. A time when my mother wore white gloves and a hat that matched her Easter finery and my father donned a lighter grey suit always accompanied by a red bow tie. They were a smart couple.
My grandmother’s sewing machine seemed to run non-stop and her first granddaughter, me, was the lucky recipient of artfully designed outfits to mark any occasion. The Easter dresses she made were always the prettiest and frilliest, sometimes even worn with a fancy hat and gloves like mom’s.
Although I don’t hide or hunt for Easter eggs anymore, I do like to make something special to celebrate the holiday and satisfy my sweet tooth. Lemon and chocolate always make my heart pitter patter. Here are two favorite recipes that sing spring.
Lemon crème is so versatile. In this simple recipe, I stir in crème fraîche to lighten the crème and give it an almost cheesecake taste, then swirl in more on top to jazz it up. Because I love the tartness of lemon and can never get enough, I topped the tart with my homemade Meyer lemon marmalade. The flavors complemented each other beautifully.
Mix the eggs, sugar and lemon juice together. Cook over medium heat for about 15 minutes or until your whisk holds most of the crème, revealing the bottom of the pan.
Spoon into a clean bowl and stir in the butter and zest. I use a lot of zest because I like a very tart crème. Adjust for your taste. Chill a few hours.
When cold, stir in the crème fraîche and pour into a pre-baked tart shell. Today I made a pine nut crust. Refrigerate and let rest until set.
To serve, spoon some lemon marmalade over the top. Light and delicious!
lemAn elegant and tasty dessert fit for any occasion. Substitute raspberries or strawberries for the marmalade if you prefer a sweeter taste.
My Italian friend Nico first introduced me to Pelligrino Artusi. I was intrigued with the gastronome who lived in the 1800’s and revered for his authentic Italian recipes. In his book, The Art of Eating Well, the recipes are rough on the edges, but the recipe for amaretti caught my eye. They are super simple to make and are crunchy on the outside and chewy on the inside. I think they would pair well with coffee or tea and could be used as a dipping biscuit, like a biscotti. I adjusted the recipe and shaped them into little droplets with an indentation to hold chocolate or ganache. I tried filling them with colored white chocolate for Easter but was not as excited about the final result as I was the chocolate.
Artusi’s Amaretti
Ingredients
2 egg whites
2 Cups powdered sugar
1/2 teaspoon almond extract or lemon/orange zest optional
Instructions
Mix the almond meal and confectioner’s sugar together. Stir in the egg whites and almond extract. I did this with my fingers. Add flavoring if desired. The almond extract delivers the extra Humph.
Sprinkle a bit of almond meal onto your work surface. Take a large piece of dough and roll it into a log about an inch in diameter. Cut into 1 inch pieces. Stand the piece upright and using your thumb, make an indentation into the center. This will be the well that holds the chocolate.
Place them on a greased and almond meal floured baking sheet or use parchment paper and bake them for 11 minutes at 325 degrees.
Let cool. Have fun decorating or enjoy them as is.
3.5.3226
The amaretti dough is easy to roll out and shape. Be creative!
Chocolate filled amaretti. A perfect little bite when your sweet tooth aches.
Did you know that leprechauns are fairies? I love St. Patrick’s Day. Not for the beer drinking necessarily but for the sheer fun of it. It’s a day to believe in faeries, shamrocks, 4-leaf clovers, and the pot of gold at the end of the rainbow. Dress in green, give a pinch here and there, and tell Irish jokes, which to me are always the funniest.
I’m celebrating this year by making one of my favorite Italian cookies, biscotti, and giving them an Irish twist. Studded with pistachios and white chocolate chips, these tender cookies make a great dessert or breakfast dipping biscuit. I follow the Williams Sonoma recipe and have always had perfection. The recipe makes a lot of biscotti so I have plenty to share with friends and still keep a few to nibble for myself.
Pistachio and white chocolate studded biscotti – irresistible!
Now back to the leprechaun story. Leprechauns, by trade, are gifted shoemakers, providing faeries with exquisite dancing shoes. Because faeries love to dance, the leprechauns keep busy making their shoes to generate a steady source of income. This allows them to accumulate multiple pots of gold that they keep hidden in the countryside. These “wee folk” are musically inclined, love to dance, sing, drink moonshine and play practical jokes. The best time to spot one is daybreak or sunset. Watch out! Because of their magical powers, they are able to vanish at first sight.
The same biscotti but with a sprinkle topping – your choice.
Adapted from Williams Sonoma Holiday Baking recipe for Hazelnut Biscotti (I could not find this recipe online or would have included a link)
8oz.or 1 stick unsalted butterI use Kerrygold Irish butter of course!
1 ½cupssugar
2eggs
3cupsflour
1tsp.baking soda
½tsp.salt
1cupcoarsely chopped or whole pistachios
1cupwhite chocolate chips or chunks
More chopped pistachios for decorating
Melted white chocolate for drizzling
Green and white sprinkles for decorating
Method
Line a large baking sheet with parchment paper.
In a large bowl, beat butter until soft. Add sugar and beat until light-colored and fluffy.
Add eggs, one at a time, beating between each addition.
Combine flour, baking soda and salt in separate bowl.
On low speed, gradually add flour mixture to butter mixture just until combined. Do not over mix.
Stir in pistachios and white chocolate.
Divide dough in half. With your hands, shape each half into a log about 12 inches long and 3 inches wide. They do not have to be perfect, as they will spread out as they cook.
Bake for approximately 35-45 minutes. Check for a nice golden top.
Remove from the oven and let cool about 15 minutes.
While still warm, carefully slice the loaves at an angle, in 1-inch increments, using a serrated knife.
Place sliced biscotti flat on a baking sheet and let cool completely. Some recipes call for putting them back in the oven to dry out and become crispy. I prefer a little give in my biscotti so usually eliminate this step.
Out of the oven, sliced and cooling.
For this recipe, my Mom and I drizzled melted white chocolate on the edges of the cookies, and then sprinkled them with either chopped pistachios or the green and white sprinkles, with shamrocks of course.
The leprechaun guarding his pot of gold!
The best part is, they keep in a tightly closed container for weeks!
I have adapted this recipe many times, using almonds and orange rind, hazelnuts and chopped dark chocolate, the sky’s the limit!
Happy 5th Birthday Sparky! I call him my lucky little St. Patty’s Day leprechaun and am ever grateful he chose me!
Sláinte or cheers in the land of the Leprechaun!
Wherever you go and whatever you do, may the luck of the Irish be there with you!
Laughter is brightest where food is best. Old Irish proverb
Olive oil is so – Italian! Its warmth and/or sassiness can jazz up almost any dish, imparting different nuances for whatever food you want to enhance. The Italians are proud of their olive heritage and like to joke that butter is “forbidden” in Pulia. Instead of butter at the table, one often finds a bottle of local oil for dipping bread or topping off pastas and salads.
I am “in amore” with olive oil and use it daily but now have a renewed appreciation for its origin and its flavor. One of the highlights of my trip to Pulia was touring a 19th century olive mill and farm called Galantino.
The family that started it all.
Galantino is dedicated to the entire process of producing exquisite oil, sustainably with the least amount of impact on Mother Earth. Most of the olives for their oils are grown on the estate from their over 15,000 trees. Olives are harvested in mid October through December and then crushed within a few hours and never more than 24 hours.
Mighty blocks of granite for the gentle press.
Giant granite rounds, which ensure a gentle, cool press, crush the olives employing the same techniques as the ancient Romans thousands of years ago. If the desired result is lemon infused olive oil, fresh lemons are crushed along with the olives. This method creates a bright, authentic fresh taste that makes my tongue revel with each sip.
Lemon infusion.
Our Italian guides gave us a lesson in tasting olive oil. Similar to tasting wine, you follow a protocol. Visually, look for a yellow/green/olive color; smell the aroma, an olive scent with tones of grass, almonds, flowers; and then sip. Taste first under the tongue for sweet and fruity. The next taste should be bitter and the third taste, hot, peppery, spicy. If you taste all these elements in a balanced and harmonious fashion, there is no added filler oil commonly included in less expensive olive oils.
A specialty oil called L’Affiorato is the hand skimmed top 2-3% of the freshly pressed olives that naturally rises to the top of the olive paste after milling. Its exquisite, delicate and fruity flavor lends itself beautifully as finishing oil.
Many of the infused flavors we tasted.
After our lesson in the production of olive oil, our host, Massimo, led us into an enchanting gazebo-covered garden where a tasting and lunch awaited us. A plate with the olive oil to be tasted was passed around accompanied by chunks of Italian bread. A unison of “oohs” and “ahs” sang out with the first taste of the olive oil soaked bread. From subtle to spicy, the distinguished flavors filled every sense in my body: the beautiful surrounding, the smell of the blossoming lemon trees, the romantic Italian accents, the feel of happiness and warmth for just being here and finally the taste of purity, of Italy, of love. I was in heaven.
Surrounded by citrus and olives.
Following the tasting, Galantino’s chef prepared a lunch spread, antipasto style, using all the oils we had just tasted. A visual feast, I could taste each dish with my eyes. Jugs of local, delicious wine graced the tables.
Antipasto style!Colorfully delicious.A more familiar caprese. The Italian cheese is so creamy.New friends.Pasta called “calamarata” probably because it looks like little calamari rings. Served with a fondue of pecorino.Sharing our enthusiasm for the food of southern Italy.
The dessert, a mandarin olive oil cake, moist and not overly sweet was simple yet sophisticated. When asked about ingredients in the cake, the chef graciously gave us the recipe verbally.
Mandarin olive oil cake served with orange sorbet, drizzled with more olive oil!
Our bellies full and our minds, just a little fuzzy from the wine, we head down a pathway to their retail store. A shopping frenzy ensued. We are handed forms to fill out so we can have our “taste of Italy” shipped back home. Since my mom and I decided that olive oil is our souvenir of the trip, we shop with abandon. We both love to cook so I know we will use all the flavors within the year- a time frame for freshness.
Mom deciding what to buy. Too many choices!
The helpful, handsome Italian men help us with our orders and assure us our oils will arrive in about two weeks time. The anticipation is already killing me!
I keep reflecting upon the genuineness, if that is a word, of this company and their high standards. Granite, sustainable, local, sweet, bitter, hot and peppery are the images etched in my memory of this enlightening trip.
Recipe for the Mandarin Olive Oil Cake
My mom and I tested the recipe given to us by Galantino’s chef and here it is with a few tweaks and twists. The texture is like a moist sponge cake, the aroma out of the oven resembles a lemon angel food cake – dreamy! Feel free to improvise with orange olive oil.
Line the bottom of a 8-9” springform pan with parchment paper. Oil the bottom and sides of the pan with olive oil.
1/3cuplemon infused olive oil or the best extra virgin olive oil you have on hand75ml
4eggs
1cupplus 1 Tbls. sugar200 gr.
zest of one lemon
1 1/2cupsplus 2 Tbls. all purpose flour200 gr.
2 ¾tsp.baking powder10 gr.
pinchof salt
Method
Stir together the oil, eggs, sugar and zest.
Mix together the flour, baking powder and salt.
Add the flour mixture to the oil and stir gently just until incorporated.
Bake for 30- 35 minutes. Test that a toothpick inserted in the center comes out clean.
Cool in pan for 15 minutes. Run a knife along the sides and release the bottom of the pan from the sides. Cool completely.
Serve with any fruit, cream, ice cream or gelato. This cake holds up well to an assortment of fillings and can be made ahead. There are so many ways to serve this simple dessert. You can also split the layer in half, fill the cake with whipped cream and sprinkle on some fresh berries or slices of summer fruit.
Garnished lemon olive oil cake with fresh orange slices and whipped cream.Let me know your versions!
The discovery of a new dish does more for the happiness of the human race than the discovery of a star. Jean Anthelme Brillat-Savarin
My baby Meyer Lemon planted last May. Star is her guardian!
When I think of lemons, this folk tune often sings in my head, “Lemon tree very pretty, and the lemon flower is sweet, but the fruit of the poor lemon is impossible to eat.”* The author, of this song, Jose Carlos Burle, must never have tasted a Meyer lemon or he wouldn’t have written this song!
My Mom’s Eureka tree – the Mother Lode!
Lemons are so happy. Their cheery yellow color radiate love, a freshness and an eagerness to be utilized to the fullest. This means the zest AND the fruit. I cannot bear to juice a lemon without first removing its fragrant and flowery rind or zest. For me, this is the flavor, and, hence from which all delicious tartness is born. The Meyer lemon, less acid, more mandarin-scented and thinner-skinned, than its brighter yellow-colored cousins, makes it the perfect flavor for desserts. Its mellow tang shines in vinaigrettes and desserts.
More orange-yellow colored Meyer is in the back and Eureka is in the forefront.
Lemons are as dear to me as chocolate. Their flavor absolutely makes a bold and intense statement. So pucker up!
Here are a few of my favorite ways to celebrate lemon season.
I love the simplicity of this vinaigrette. The lemon gracefully enhances the lettuce leaves. Feel free to embellish it with capers, fresh herbs or olives. I tossed it with warm vegetable ravioli (butternut squash would be good) and was delighted with the taste. Also I can envision this dressing a niçoise salad, or any tuna salad. Feel free to adjust seasonings, amount of lemon juice or oil.
Whisk the lemon juice and zest into the Dijon mustard. Slowly add the oil, whisking constantly until the vinaigrette fuses together. Add salt to taste. Adjust the amount of oil if it is too tangy for your taste.
2 Tbls. finely chopped parsley, basil, dill, mint, etc.
1 tsp. finely chopped shallot or garlic
Instructions
Combine all ingredients. It is easiest accomplished with a food processor.
Spoon butter onto a piece of plastic wrap or waxed paper. Shape the butter into a log and roll it up in the wrap. Freeze until firm. To use, slice off discs and use as added flavor on top of chicken or fish, vegetables, pasta or rice.
I experimented with a few ways to “candy” lemon peel. I must say, it is not as easy as it sounds! My favorite way to create the peel I used for the tarts was to use very thin yellow-only julienne skins, simmered in a sugar syrup, then dipped in sugar. If you would like the recipe, I recommend the one from Epicurious at the bottom of this blog.
In a food processor combine the flour, salt, and powdered sugar. Pulse until blended.
Add the butter. Pulse again just until butter and flour form small peas.
Mix cold water and egg yolk. Add to mixture. If you live in a dry climate or if the weather is very warm, you will probably need the extra 4th tablespoon of water.
Pulse just until combined.
Form into a ball. Wrap in plastic wrap and refrigerate at least an hour to rest the dough.
Roll dough to 1/4” thickness. Depending upon the size of tart mold you are using cut out rounds of dough and place in molds. Refrigerate or freeze.
I prefer these sweet little tart molds. They have such character!
Lemon Filling: (caution! This is an adapted recipe from a French version so don’t be intimidated by the gram measures)
Mix together powdered sugar and lemon juice. Whisk in eggs. Stir in cooled clarified butter.
Cook over low to medium heat for about 20 minutes or until lemon coats the back of a spoon.
Pour into a bowl and cover with plastic wrap. Refrigerate.
210 grams or 1 ¾ cups of powdered sugar
2 lemons juice and zest
5 eggs
3/8 cup clarified butter
Mix together powdered sugar and lemon juice. Whisk in eggs. Stir in cooled clarified butter.
Cook over low to medium heat for about 20 minutes or until lemon coats the back of a spoon.
Pour into a bowl and cover with plastic wrap. Refrigerate.
Zesty lemon just waiting to be savored.
To make the tarts:
Carefully fill the cold tart shells about ¾ full with the lemon filling.
Bake in a 375 degree oven for about 15-20 minutes or until the shells brown and the filling is bubbly.
Le tart citron. Almost too pretty to eat!
Let cool. Filling will “settle” meaning it ends up sinking a bit in the shell. Don’t worry. It will still taste fabulous. Either top with a candied lemon slice or pipe a bit of lemon mousse on top. For the mousse, I just add a little of the lemon crème to whipped cream and fold gently. Pipe mousse on top of the tart and garnish with slivered candied lemon peel, candied violets or mint leaves. I love these tarts for a refreshing springtime dessert or any season for that matter. They are a delightful treat for baby or bridal showers or for an afternoon tea party.
100 things to do with a Meyer Lemon from the LA Times: Hhttp://www.latimes.com/features/la-fo-meyerlemons16jan16,0,5003872.storyere are a few more sites for ideas with Meyer (or any variety of) lemons:
My favorite recipe for candied lemons: http://www.epicurious.com/recipes/food/views/Candied-Lemon-Peels-232352
A good story on Meyer Lemons from NPR:http://www.npr.org/templates/story/story.php?storyId=100778147
How to make clarified butter from Joy the Baker: http://www.joyofbaking.com/ClarifiedButter.html
Avec l’amour de ma maison à la vôtre avec l’amour, le bonheur et la bonne santé (With love from my house to yours with love, happiness and good health)
Happy New Year! Let’s celebrate Le Réveillon (a huge feast and party) with Le Galette des Rois (King’s Cake)
Shelter Island Sunrise
The new year brings hope of new beginnings and closure to old endings. I started January 1st by watching the sunrise at Shelter Island and then viewing a brilliant, fiery sunset at Mission Beach in San Diego.
Mission Beach Sunset
My dreams and aspirations for this year are to write this blog at least twice a month, continue with my French lessons, immerse myself in nature, and once again travel abroad.
Curious about how the French ring in the new year, I quizzed my friend Jacques, who lives in Villeneuve-Sur-Lot in southwestern France about his traditions and discovered that the French take the celebration seriously.
My friend Jacques
Here is what he has to say about the réveillon or new year’s celebration.
Yes we celebrate what we call “le réveillon de la saint Sylvestre. ” We have a get together with friends at 9 or 10 pm. We need a large house for that. This year we were 16 old friends at the same table. We eat and we drink a lot. This year we have eaten:
foie gras with Champagne as appetizers
oysters
roasted turkey
lots of veggies (potatoes , celery, chestnuts)
salad and cheese
lots of cakes
When midnight arrives we stop to eat and we give lots of kisses and we never forget to say ” bonne et heureuse année!” (Happy New Year!) This is our special feast. And I think we’re numerous in France to celebrate the New Year like that. Some of us buy a few branches of mistletoe in order to decorate houses, trees , lights and so on. It’s an old , very old story which comes from the Gauls…
When I was young I remember that we had a dinner at 8pm …then comes “le Réveillon” when 12 comes: oysters and foie gras. Nowadays we have only one meal like I have tried to describe. At midnight (or in the morning) we use to call friends in order to wish them a happy New Year .
On January 6th, or the first Sunday of January, the French celebrate Epiphany and on this day, make or buy a Galette des Rois, (King’s Cake), an almond crème filled puff pastry. What makes this cake special is the fava bean tucked into the filling. The person who bites into or discovers the fava bean becomes king or queen, receives a paper crown, and chooses a partner. This person is then usually responsible for making or buying next year’s cake.
Le Galette des Rois
I have fond memories of learning the fine art of puff pastry while a student at La Varenne in Paris. This multi-layered dough is quite a time-consuming process in itself but well worth the effort should you attempt it. In a nutshell, you carefully combine flour, water, salt, and cold butter as you would for a pie crust. Bring the mixture together to form a rectangle; let it rest then roll it out to a 10” X 10” square; add more butter, rolling and folding over itself several times it so the butter is evenly dispersed. This creates layer upon layer of delicate, flaky pastry which will rise three to four times its original height during baking. If you rolled and turned the pastry six times, you would have 729 layers! Our adorable pastry instructor, Albert Jorant, with his twinkling blue eyes and beaming smile, shows me how to handle the dough for this galette. Placing his hands on mine, we pat the dough together. Suddenly he exclaims, “Your hands are cold! You will make the perfect pastry chef!” That was the beginning of my culinary career. His confidence in my cold hands empowered me. From that day on, he took me under his wing and attentively instructed me on the fine art of French desserts. His enthusiasm and passion was contagious and soon, my puff dough was rising sky-high. Because puff pastry is such a delicate dough to produce, if you don’t feel up to the challenge, I recommend purchasing it from Trader Joe’s, major supermarket chains which carry Pepperidge Farms Puff Dough or your local French bakery, which is what I did. Julia Child created an easier method for making puff pastry. See her book, The Way to Cook, page 389. King Arthur Flour also has a classical recipe as well as a shortened version of puff dough on their website.
Here is the traditional recipe for Galette des Rois.
Puff Pastry Dough, about 1 ½ lbs.
For the Almond Crème: From a La Varenne recipe
½ cup softened butter
2/3 cup sugar
1 egg
1 egg yolk
1 cup almond flour (find at Trader Joe’s or health food stores)
2 Tbls. Flour
2 Tbls. dark rum or 1 tsp. vanilla
Egg glaze: 1 egg beaten with 1 tsp. of water
Cream the butter and sugar together until soft and creamy. Add the egg. The mixture will look curdly at first but then come together as a fluff. Add the egg yolk and beat well again. Stir together the almond flour and flour. Carefully stir in the almond/flour mix into the creamed butter. Stir in the rum or vanilla. You can chill this mixture until ready to use or for several days.
If making your own pastry, roll to ¼” thick. Cut two 9” circles out of the pastry dough and chill.
Puff pastry dough ready to assemble.
Heat oven to 425 degrees. If using a convection oven, heat to 400 degrees.
Take the chilled circles out of the frig. Place one circle on a cookie sheet. Spread the almond crème into the center of the circle and spread it to within ½” of the edge. Brush the egg glaze on the edge of the dough taking care not to let the glaze run down the sides of the dough. If this happens, it will seal the edges together and prevent the dough from rising.
Almond filling with the fava bean awaiting its next king or queen.
Take the second circle out of the frig and score it decoratively with a series of arcs. Place the pretty second circle evenly on top of the almond crème, pressing the edges together. I took the handle of a wooden spoon and pressed it into the crust edge all the way around to create small indentations and insure that the crème would not leak out.
Glaze the top of the galette with the egg glaze and sprinkle with sugar.
Bake in a hot oven for 25 minutes. The crust will be dark brown. Make sure you cook it long enough or the dough in the inside will still be raw. Look on the bottom of the galette and if it is dark brown, the chances are good that it is cooked thoroughly.
Let cool, then slice into wedges. The filling is amazing and will forever more be my go-to almond filling. I made it with the rum and am glad I did. Its dense subtle sweetness hinting of rum was reminiscent of the fine pastries of Paris. You will not be disappointed!
Crispy and creamy. I couldn’t stop munching. Just one more slice!
May your year be filled with special moments, places and faces.
Mirna, my sister-in-law or ma belle soeur, as we fondly regard ourselves, never ceases to amaze me with her culinary creativity.
Ma belle soeur, Mirna, the culinary visionary.
While visiting Denver a few weeks ago, as I do every autumn, Mirna shared with me a recipe she devised that is gluten-free, full of apples and delicious. It all started with a visit to a French bakery and bistro nearby. Pierre Michel, a tiny unassuming authentic French bakery tucked into a shopping center, bakes up a buttery, crispy croissant stuffed with thick, sticky almond filling.
Rich and buttery breakfast pastries baked by a true artist.
Curious about how to make our own almond filling, we experimented with grinding whole almonds with a rotary cheese grater. The results were perfect but oh, the work involved. Buying almond meal made more sense. Our conversation moved from croissant filling to another French almond cookie, the macaroon. Inspired by its delicate crunchy texture which dissolves on the tongue, Mirna wished to deflate the sweetness. Traditional French macaroons are sandwiched with rich ganache, Crème Chantilly or other filling. To us, they become so sweet that you can just have a bite before your face curls and your brain reacts to the sugar overload. The challenge: how to substitute fruit for the ganache and cut the sweetness.
Her solution to the macaroon sandwich was to prepare a meringue, then fold in almond meal. A fruit layer below the meringue would soften the sweetness. Voila! This topping bakes up like a moist cake with a macaroon feel to it and is the perfect marriage for sautéed fruit. We used apples but it would be delicious with plums, cherries, pears, even fuyu persimmons which I plan to try. It is simple to make and as I found out last night when I took it to a dinner party, a real crowd pleaser.
Beginning the sauté process. I love the tart and sweet Honey Crisp apple variety.
See how the apples take on the caramel appearance.
You can add as many apples as you like. I prefer a thin layer to just highlight the main actress – the meringue topping.
A gentle fold of the almond meal into the meringue helps keep its shape.
Artfully swirl away!
Bake until golden brown 35-40 minutes. I made one dessert with convection and one without. No difference.
I finished the cake with a dollop of a crème fraiche/whipped cream mixture, then sprinkled toasted almonds on top. A sprig of Salvia from my garden gave color.
Apple Almond Macaroon
4 Tablespoons unsalted butter
pinch of salt
1/4 cup white sugar
1/4 cup brown sugar
4-5 large apples (I like Honey Crisp), cut in ¼ inch slices, then slices cut in half
4 egg whites at room temperature
1 cup sugar
½ tsp. almond extract
½ tsp. vanilla extract
1 ½ cups almond meal*
* Almond meal or flour is available at Trader Joe’s, Whole Foods, Bob’s Red Mill, Sprouts and King Arthur to name a few.
Preheat the oven to 350 degrees
Butter the bottom of a 8-9” springform pan
Melt the butter in a large sauté pan. If you wish, you can use an iron skillet and bake the dessert in the pan.
Add the sugar and salt and cook while adding the apple slices. I don’t peel the apples but feel free to peel away if that is your preference. Note: while taking a chocolate making class years ago, I learned that a pinch of salt added to sugar and butter helps to keep the butter from separating from the sugar. This also works well when making English Toffee!
Sauté the apples until soft and the liquid begins to evaporate. This will take about 15 minutes and create a caramel sauce.
Pour the apples into the springform pan.
Meringue Layer
Pour the clean egg whites into a mixer fitted with a wire whisk. I love the Kitchen Aid my Grandmother purchased for me over 30 years ago.
Add a pinch of salt.
Beat on medium speed until the whites pull together and begin forming soft peaks.
Drizzle the sugar in slowly, stopping to scrap down the sides from time to time.
When all sugar is incorporated, beat at high for about one minute. Beat in the almond and vanilla extracts.
Take the bowl off the mixer and gently fold in the almond meal, in thirds. Do not overmix!
Spoon the meringue over the apples (I have spooned over both cooled and warmed apples and there is no difference in results!).
With a spatula, swirl the meringue artistically to create a design.
Bake for 40 minutes or until golden brown.
Cool for 30 minutes, then release the springform side.
This dessert can be made the day before, as I did, or served warm. I love how it slices and holds its shape. A garnish of half whipped cream and half crème fraiche, topped with sliced almonds gives it a finished and professional look.
Thanks to you Mirna for taking the macaroon to new heights! This is one of my favorite new recipes and I will be seasonally changing out fruits for years to come. It is the perfect company or dinner party dessert!!
As a pastry chef, fruit desserts were my specialty as well as my favorite pastries to create. If fruit was in season, it showed up in abundance in my pastry case from Strawberry Napoleons to a Blueberry Bourbon Cream Cake, a tall tower of thin cakes spread and layered with a light bourbon cream and fresh blueberries. It was delicious and decadent! If this blueberry cake recipe interests you, let me know and I will post it.
In researching blueberries in France, I came upon the region of Auvergne, just north of where I stayed in Languedoc, where blueberries reign and a famous Tarte au Myrtilles originated. I made the European version but was a bit disappointed with the results so chose to modify a Cooking Channel recipe with crème fraîche to give it a French flair.
Jacques Pepin’s recipe for Pate Sucre or a sugar cookie crust is by far my favorite.
Mis on place. Ready to get started.
The pillow top filling of cream cheese, crème fraîche and sugar.
Gently cook the berries to retain their gorgeous shape.
Mom pours the luscious berries over the creamy filling.
Decked out and ready to eat. I like the rustic look of it.
Each version of a fruit tart, like the Clafoutis, is a variation on a theme, each one with a different twist.
This weekend mom and I made multiple blueberry desserts and chose the best to share with you. My mom made divine blueberry sour cream ice cream.
Blueberries and Cream Ice Cream. You will not be satisfied with just one scoop!
A duet of flavors. The picture shows how beautifully the ice cream pairs with the tart.
Speaking of my mom, let me introduce her. She is a gourmet cook from the get-go, I’m sure inheriting the genes of her mother who also had a gift in the kitchen.
Mom – my collaborator, mentor and best friend!
We’ve spent many days and nights cooking together canning mango chutney, pitting cherries or creating jams with the apricots from her tree. She is my inspiration. As we were steeped in blueberries and trying recipes, she began to tell me her blueberry story. I’d love to share it with you.
Blueberries…….How I wish I lived in the places where blueberries grow wild. My mom tells me stories of how she picked blueberries right in front of the cottage where her family vacationed in Michigan. If she and her sister filled a large pail of berries, Swedish pancakes were the reward. Her grandfather’s cousin, Uncle Axel, resided in another house on the property and was a master cook at those delectable pancakes smothered in blueberry “syrup”. Of course they ate as many as they picked but what was in the pail, appeared on cereal in the morning, in pie after dinner, and just “as is” in a bowl to eat as you passed by. My mom says that there has never been a blueberry that tasted as sweet and delicious as the wild ones that grew around Higgins Lake in Michigan.
Anticipating the first bite of these juicy little gems.
Since I don’t live in “blueberry country”, I must do with the large containers of berries from Oregon and other growing places. What to do with them? Take a page out of mom’s childhood. Make syrup, make pies, make crumbles, and kuchens. Add them to a bowl of mixed fruit for a salad, and if you are so inclined, crank up the ice cream maker and add the blueberries to a custard for a cool and refreshing dessert.
Happy Birthday Mom!!
To make these desserts, you can visit these websites for the recipes:
Blueberry Tart In improvising, I made Jacques Pepin’s Pate Sucre recipe and added more crème fraîche than sour cream.
Do you sometimes get that overwhelmed feeling? That’s where I am today. I so want to share with you everything that is swirling around in my head. But where do I find the time? Since returning from France with a million ideas to post, I find that my garden, my home, my real workplace, my dogs, and everything else is catching up with me..so be patient and as soon as I get caught up, my posts will come as regularly as you have come to expect. For now, enjoy the season of cherries.
I know summer has arrived when the cherries have finally made their appearance at my local markets. Worldwide shipping has made it possible to have peaches, nectarines and plums in out-of-peak season but there is only one cherry season – thank goodness.
Wild sweet cherries along the trail.
The French love their cherries. Most homes I visited in the Dordogne have backyards abundant with fruit trees and they all have a couple of cherry trees. The hiking trails of southern France are dotted with wild cherry trees and hikers often stop for a quick nibble. Last year while hiking in the Perigord region, I was fortunate to experience this treat, along with the fraises des bois or wild strawberries that grew along the roadside.
Our hiking group enjoying a snack courtesy of Mother Nature. Note the cherry trees on the right.
My friend Jacques invited me to have drinks with friends of his in Villeneuve. When we arrived, our hostess was in the kitchen, her table overflowing with the harvest of her cherry trees. She explained that it was taking her all day just to pit the cherries so she could preserve her bounty. Of course, she will make the French traditional dessert, clafoutis as well.
Fresh, ruby cherries await their future.
Clafoutis is a country French dessert originating from the Limousin region. This rustic cherry-studded pancake, pronounced kla-foo-TEE, is a favorite among many French households. In fact, everywhere I was invited, it was cherry clafoutis – for an afternoon snack or for dessert. One thing that surprised me was that the home cooks do not pit their cherries. You just plow through the spongy cake, carefully chewing the cherry before removing the pit from your mouth somewhat gracefully. Upon researching the cherry and this recipe, I discovered that there is a very good reason for leaving the pits intact in the cherry. Traditionally the cherries were left unpitted so the kernels could release their delicate almond flavor as they baked.
I chose this recipe above all others because the sliced almonds gave it a sexier appearance and I liked the fact that the cherries are soaked in Kirsch, a cherry liquor, to give the clafoutis a bit more flavor.
Cherry-dotted crust – so lovely!
My recipe turned out perfectly and I loved how the cherries embraced the edges of the pie dish, forming a pretty crust. You might want to make this to celebrate Bastille Day, this Saturday, July the 14th.
Warm clafoutis with a dust of powdered sugar makes an elegant, yet simple summer dessert. Serve with ice cream or crème fraîche for added decadence.
Preserving and canning are also my summer passions but this year I wanted to do something other than making jam. After perusing various cherry recipes, I landed upon Brandied Cherries. Yum! These too are easy to make, will be lovely holiday gifts and delicious spooned over some vanilla ice cream. The recipe, which I successfully halved, is from Epicurious http://www.epicurious.com/recipes/food/views/Brandied-Black-Cherries-102090
Poached cherries ready for their brandy syrup bath.
Spoon the cherries into pretty jars, let them macerate in a cool dark place for a few months (if you can wait) and you will be rewarded with the fresh taste of cherries with a hint of brandy. Sophisticated.
Glistening cherries will sleep for several months to intensify the brandy flavor. Spoon over ice cream and use the liquid as a base for a spritzer or champagne cocktail.
Fruit desserts are my favorite so look for more creations in upcoming posts. I just bought a pound of blueberries so I will be experimenting this week with new ideas. Until next week, a bientot!
Bonjour mes amies! To celebrate my friend, Liz’s birthday, we dined in a tiny restaurant with a downstairs cave or wine cellar. So intimate, and uplit to create a warm glow, Le Sixieme Sens was about to become one of my most memorable meals ever. The combination of rustic stone, bright green place settings, and buddas somehow all work together to create an ambiance that I had never experienced before.
Our server, Sebastian, a quiet gentleman with a wry smile, answered our questions and guided us through the menu. We began with a Kir Royale, champagne, and cassis, served with salted peanuts and pistachios. Sebastian suggested we try a local red wine, from Carcassonne, a 2008 Chateau Sesguieres Cabardes, soft with tones of dark berries.
I chose the Le Menu, meaning a meal at a fixed price (prix fixe) which includes three courses. The first course was a salade of duck breast with a slice of foie gras ( I know, it is so politically incorrect to eat this stuff) but we are in France and the French are proud of their traditions. I had not eaten foie gras for 33 years and enjoyed every bite of this creamy pate.
The main course consisted of a trio of seafood, prawns, salmon, and a local seabass-type fish, lightly grilled with a parsley butter sauce and served with angel hair pasta.
My companions all had the beef tenderloin with red wine or mushroom sauce. Enough for three hungry people!
Dessert was a slice of one of my French favorites, Tarte Tatin, a rustic caramelized apple tart with a flaky puff pastry crust. This was so charmingly served with a small glass jar of creamy, cold, intensely flavored vanilla ice cream.
We profusely thanked our host, Lionel, who is the chef and owner of Le Sixieme Sens. He gave us all kisses and seemed pleased we had such a fabulous experience. Because the food was so spectacular, he offered to make us a special dinner of our request later on this week. We promised we would do some research and come up with something delicious and challenging for him to make. What will he create? Stay tuned!


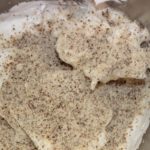
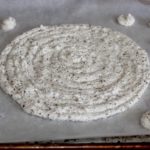


